Friday, January 31, 2014

White White Baby: How to Paint your Cabinets

We love white cabinets. They make a kitchen feel open and airy and fresh. When we were looking for a house, we hoped we'd either A. find existing white cabinets, or B. find outdated cabinets that we could paint white ourselves.  Lucky for us, "B' is what we got. We initially weren't sure, however, whether we were skilled enough DIYers to take on such a project. On the day we closed, I remember sitting in the title office discussing our cabinet-painting plans with our realtor when a rando contractor/self proclaimed-painting-expert decided to chime in behind us. He explained that trying to paint cabinets when we had never done it before was a really bad idea and proceeded to go on a rant about how he was always the one who had to go in peoples houses and 'fix' their bad cabinet paint jobs. Way to shoot down all our hopes and dreams, dude. So that led to me contacting a handy man a few days later to get a quote on painting all of our cabinets, trim, and mantle. In case you were wondering, it costs $3,000. As far as we know, that may be a fair price considering all the work necessary, but dangggg that's a lot of benjamins we'd have to shell out. We immediately did not care about the rando contractor's comments and decided we'd tackle the project ourselves.

We closed on our house and moved during the week of Thanksgiving, so our family members were gracious enough to come see the new house and tackle a few projects with us during the holiday. Our poor parents and siblings thought they'd just be painting walls. We had other plans for them. Yes, we needed a BUNCH of walls (and still do) to be painted but we figured we'd take advantage of all the help while we had it, and tackle our largest project first. So cabinets here we came. We did a lot of online research on the best methods, and ended up using Young House Love's advice (their makeover here) the most.  They even had how-to videos. Que the halleluiah music.

Here's how it all went down.
Step 1: The first (and most obvious) step is removing all the drawers, door fronts, and brackets, which I'm showing so expertly below. We also made sure to number off each door by putting a little piece of numbered tape where the bracket would normally go (i.e. where we won't need to paint over) so that we would know where to reinstall each door after it was painted. Believe me, ALL The doors start to look the same after a while.
Step 2: Degloss EVERYTHING.  We used the Next Liquid deglosser that you can find any Lowes/Home Depot. This was really easy, you basically rub the deglosser liquid on the wood, and immediately wipe it off. It's not really stripping the stain off the wood, it's more for removing the gloss finish so that the primer and paint will adhere to the wood better. Hmm imagine that...A deglosser de-glosses.
Step 3: After the cabinets were dry from the last step, we filled any random holes we saw with wood filler (we used Elmer's brand). We had some really lovely/awful decorative pulls on a few of the doors that we would obviously not be reusing. These special brass pulls required two holes in the door so we patched one of the holes to keep it consistent with the rest of the cabinets. 


Step 4: After taping everything off, we moved right along to sanding. Lucky for us, my dad already had a power sander  that we were able to use. I really wouldn't recommend hand sanding everything unless you like torturing yourself. We used 220 grit sandpaper (which means very fine if you're like me and don't know sandpaper lingo). The purpose again was to just rough up the surfaces so that the primer had something to adhere to. Sanding sucks. And not only does it suck, it takes forever. For the most part, our cabinet doors are flat with minimal decorative details, so the majority of the surfaces could be sanded with the power sander. We still had to go back with a hand sander though, and get in between all the grooves and corners where the power sander couldn't reach. Have I mentioned sanding sucks? Just clearing that up. It's a necessary step though so we powered through it. (see what I did there?)


(notice on the left in that last picture how we set up a coffee station amid all the sanding. Priorities people.) 

Step 5: Cleaning up our sanding mess. Sanding leaves lots of dust...everywhere. It was important that we get rid of all the dust off the wood before priming because you just don't want all that getting on your brush or in your paint. Devin found a more creative way of speeding up the process. Men and their lawn tools.

Even after the manly blow drying was over, we still had to wipe everything down with tack cloth to make sure no residual dust was hanging around. Tack cloth is basically cloth you can find any any hardware store that has this weird sticky substance on it. It worked like a charm!
Step 6: Priming! We were finally getting somewhere, but this was the step where our family members had to leave us and return home. It felt like they were dropping us off at college all over again, leaving us to fend for ourselves in this adult world. Kind of scary and exciting all at the same time.  Anyway, back to business: We used Sherwin Williams Multi-purpose latex primer which is a water based primer that's great for stain-blocking. Sherwin Williams was really great too because they gave us a full print out on tips for painting cabinets as well as details on the paint regarding how long it takes to dry, recoat, etc.

We started out priming the backs of the doors so we could get the technique down before we moved on to the more visible fronts and cabinet cases. It was pretty easy- we started by priming in the grooves and edges with a brush, and then went back with a roller to smooth out the brush stokes and prime the flat surfaces. We also put a few pieces of wood underneath the doors so that it was easier to paint around the edges and not get the table so messy. I worked my magic with the Lowe's guy and convinced him to donate some of his scrap pieces of wood laying around, so those bad boys were zero dineros.
 They already look so much better with just a coat of primer, don't you think?
Step 7: The time has finally come to whip out the paint! We used Sherwin Williams ProClassic, which is ideal for doors, cabinets, and trim. Perf. We chose their Downy white color (doesn't that sound so fresh and lovely?!) which is not too stark white but not too yellowy either. The molding in the rest of our house is kind of a cream/off-white color so it was important that the cabinets blended. We used the same process painting as we did with the priming where we would start out brushing in the grooves, making sure not to leave behind any big drips, and then following behind it with a roller.

Remember how I said sanding takes forever? I was lying. Painting takes forever. Especially when you have to apply three freaking coats on each side of every door. So basically six coats. And you have to wait 4 hours between each coat. Oh and we had FOURTY SIX doors/drawers. That's just way too much math for me to try and figure out how long that took but trust me- it was a long time. After painting the first few cabinet doors, I quickly realized it was going to be a much longer process than I anticipated which resulted in me eating Ramen noodles on a regular basis. It's like Ramen was made for people who had kitchen renovations. Your meal is in a throw-away container and all you need is a plastic spoon. No dishes required!

 After what seemed like an eternity, we prevailed and  finally finished the kitchen cabinets. Success!
Since the weather was too cold for the paint to dry outside, we set up our little drying station in the study 


 Did I mention we got a nice, shiny new refrigerator in the middle of all this too? It's a Samsung. And it's awesome.


After browsing the hardware aisle at Lowe's a few times to make our selection, we decided on a more sleek looking, yet budget friendly silver pull and a classic round knob. We're BFFs with Lowe's these days if you haven't noticed.

One other final detail worth mentioning was that we replaced the outdated opaque glass in the upper cabinets with new clear glass.


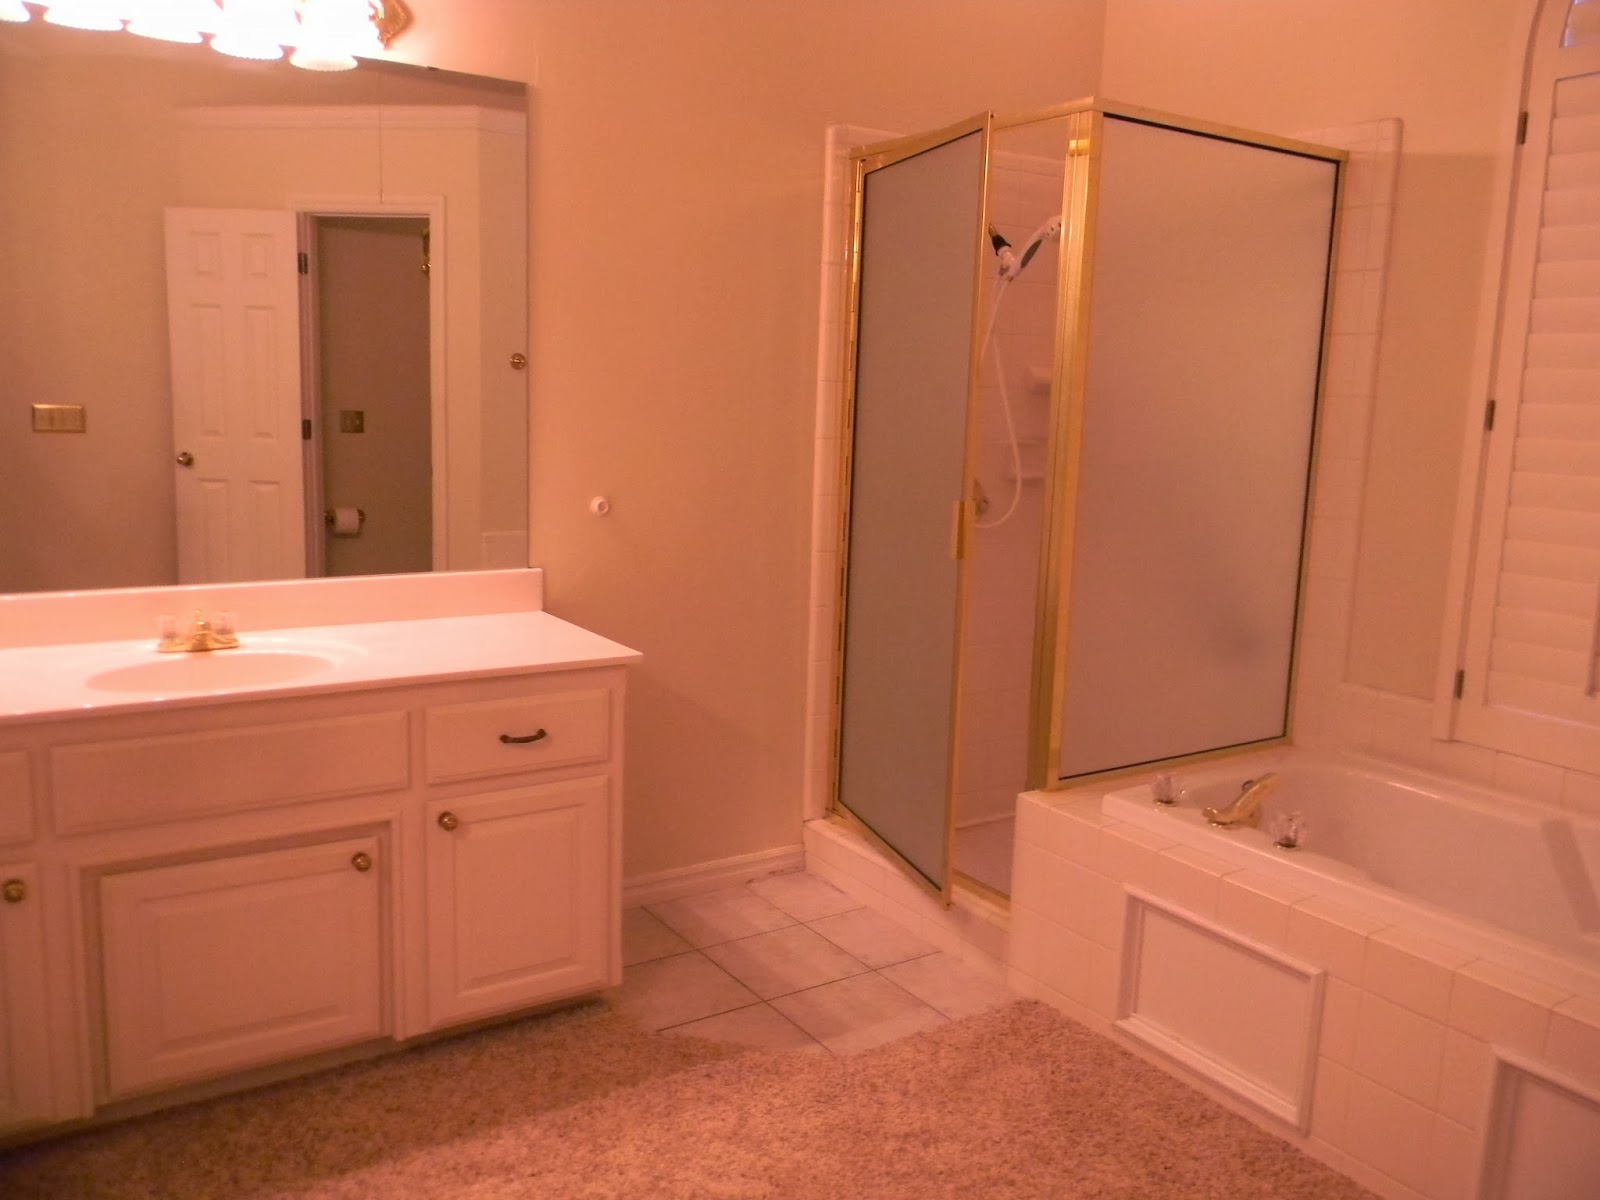
Let's take a little journey back to what it all looked like before:


I didn't really foresee myself having a blog while we were doing this project so we didn't exactly take as many pictures of the process as we should have....So we'll have to jump a few steps forward past the molding being painted, the island being removed, and the walls being textured/painted to see what the end result looks like:

It's funny how the floral fruit being gone really introduces our eyes to the cabinets and countertops that we didn't notice as much before. It's also amazing what a few (or 6) coats of paint will do to a room.
We hope you like it! On the next post, we'll go into more detail about how we textured the walls.
Adios!
K+D

Wednesday, January 29, 2014

Where it all Began

Before we dive into our DIY adventures, we want to first share where it all began. The 'before' pictures if you will. These pictures were taken with our iPhones when we first toured/fell in love with the house. I mean come on, I don't know how that gorgeous floral fruit wallpaper didn't make everyone else fall in love with the house that toured it before us. Really though, it's in a great neighborhood, it has the study and bedrooms that we were looking for, and an open concept kitchen-family room so all of our requirements were checked off the list. The fact that the backyard is to.die.for. and that it's on a cul-de-sac just sealed the deal for us.  We could see the huge potential in this house so we were more than willing to deal with a little wallpaper.

Entry Way (duh). That door on the right leads to our study and the carpeted area on the left is the dining room.

Formal living (That's straight ahead when you walk in the front door) with a beautiful view of the backyard. We have absolutely no idea what we'll do with this room yet.


 Gotta love 90's brass chandeliers!


 Study.
 Built-ins=awesome. Oak=not so awesome

And here's the floral fruit! So eye catching, right? The seller also left us this massive wood island. So sweet of them. We later realized they left it because it doesn't fit through any doorway. Perf.

The seller put in a travertine backsplash, granite countertops and a new sink to help sell the house. Seriously, how did we get so lucky?!

We see barstools in our future. Oh and a new light fixture that doesn't hang directly over the walkway to the family room. Awkward!

The seller ALSO left us these sweet curtains and tv stand circa 1995. Saweeettt
  
Soon after buying the house, we bought a brand new washer and dryer to fill that space. Don't worry, we'll show pictures of those beauties later.

That's what golf wallpaper looks like. It even came with a golf themed border and light switch cover.


Bedroom #1 aka guest room. Sorry for the bad lighting.


 Bedroom #2. You COULD call this the future nursery. FAR future.

Guest bath.


Master. That door leads to the backyard, which has been very convenient with Bear's potty schedule at 3am 

Master bath and closet. We always dreamed of having carpet in our bathroom. Oh and don't worry...there's another sink on the left not shown in this picture. We don't have to share. We learned that in marriage counseling. 1. Love God. 2. Love each other 3. Don't share sinks. It's for the best.


Our backyard that we have been drooling over since we bought the house.

And that's our place! We are seriously so blessed and we keep pinching ourselves on a daily basis. We can't wait to see how this place transforms but (spoil alert) we already know what the kitchen will look like. That's on the next post.
Love you all!
K+D


Tuesday, January 28, 2014

We bought a house!

Friends, family, and randoms,
K+D here. Guess what? We bought a house! And we couldn't be more excited about it. No more tiptoeing around on the third floor, pulling our hair out dealing with the apartment front office people, stuffing our belongings in tiny storage closets, or crappy parking situations because WE BOUGHT A HOUSE! (Have I said that yet?)

Now that we've officially lived here for 2 months and tackled our first few project makeovers, we decided to start this to simply share our progress.  We realize we're now those people who have a home DIY blog but we hope this will be less annoying than blowing up all of our friends phones and social media sites with pictures. So here is first of hopefully many posts about success (or not-so-success) stories we'll have with our McEntire house makeover. Peace!