Wednesday, June 25, 2014

Removing the Sliding Shower Door

Two posts in one week? What? That never happens! Being wallpaper-free around here is pretty exciting but I felt like Monday's post was a little uneventful....So I thought I'd share another update in the guest bath that makes a HUGE difference. If you're good with context clues (i.e. the title of this blog post) you've already figured out what our update is. We FINALLY removed the ugly brass sliding shower door in the bathroom.
This was one of those projects that intimidated me. It just looks so permanent. And hard to remove. I kept envisioning needing to use a jackhammer to get the darn thing out, and ruining all the tile in the process.
Picture this:
Thankfully this picture never came to fruition. As it turns out, removing sliding shower doors are really easy to do. I would have removed this bad boy months ago had I known it was this easy. 

This project only required two tools: A box knife and a drill (you could always use an old fashioned screwdriver if you wanted to put a little elbow grease into it but I had already worked out for the day.) 


The first step was taking out the actual doors from the frame. One of the doors was secured with a little metal guard at the bottom on the rail so I had to remove that to get both doors out. Other than that, it was as simple as lifting them up to clear the bottom rail and taking them out.


 Doesn't it already look better?

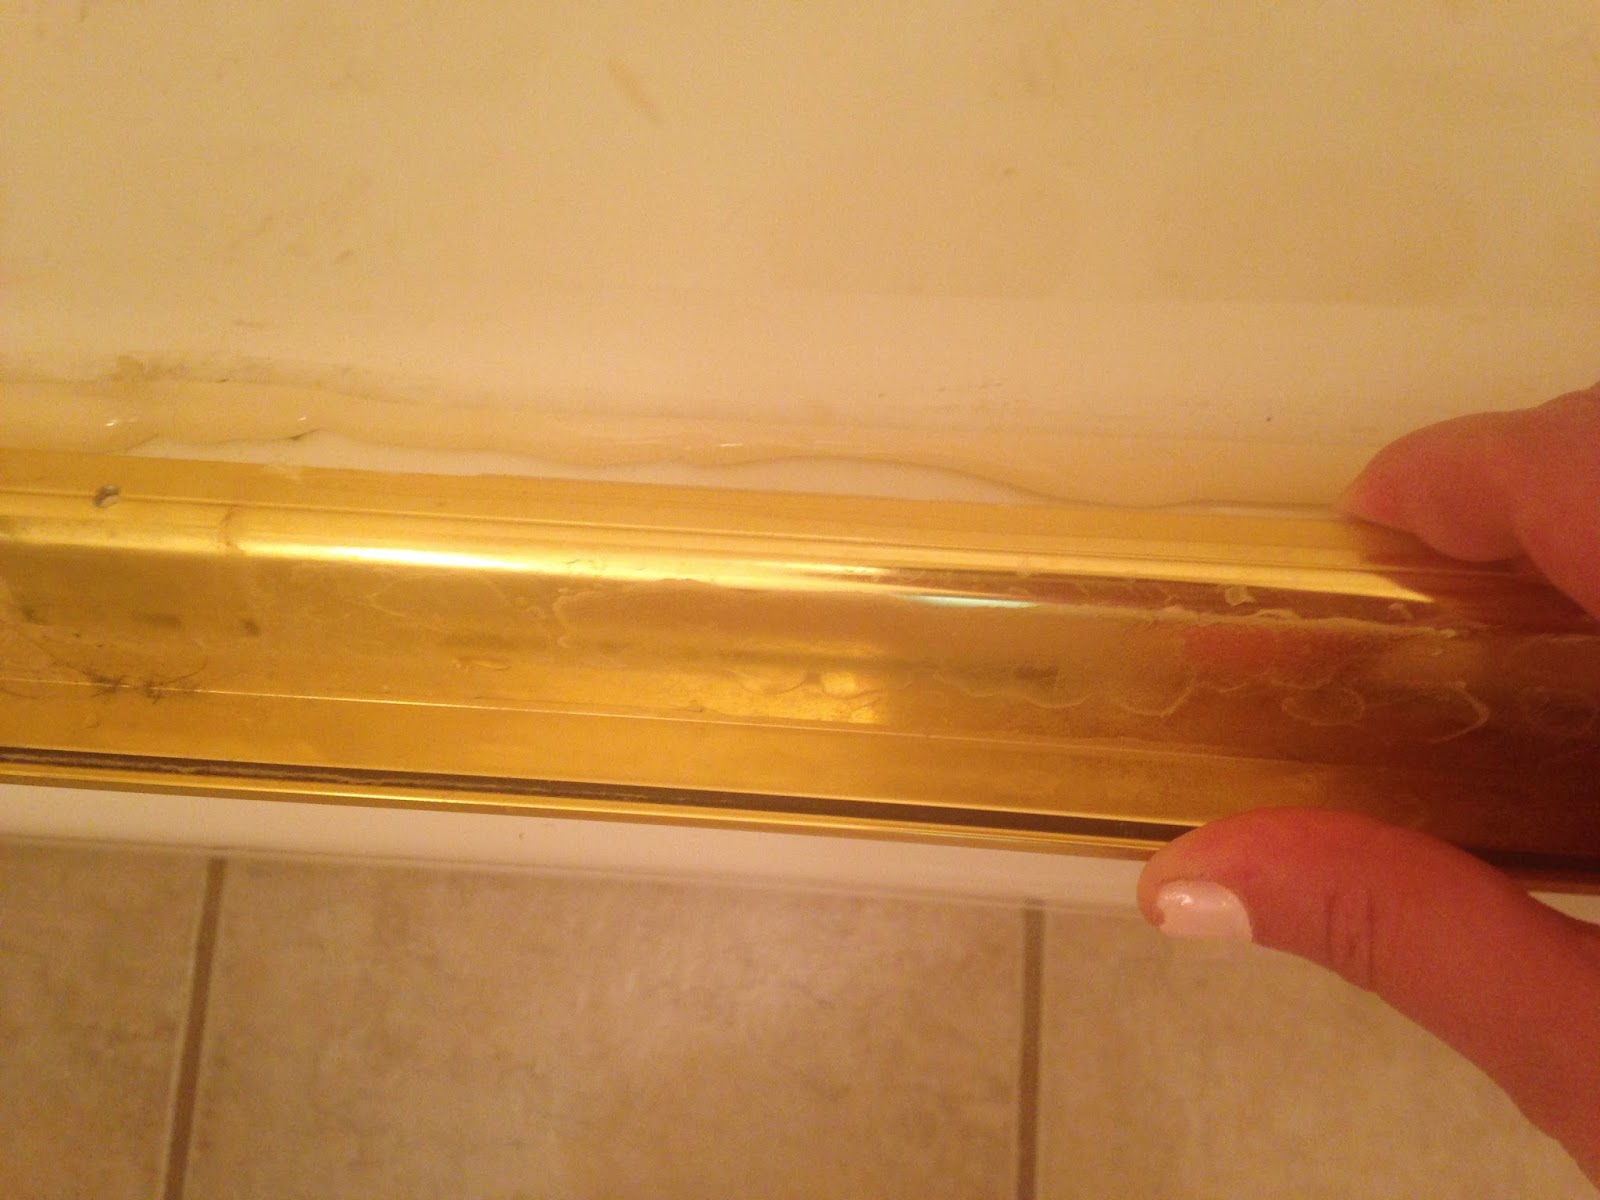
Next, I had to remove the top rail. I scored the caulk along the side and it popped off like presto magic.


The side rails were connected to the walls with screws so I unscrewed those, and then used my box knife again to lift up the caulk from the wall. The key was making sure my box knife was parallel to the tile. You never want to hold a knife perpendicular to tile unless you want some broken tile. I definitely didn't want that, or I would have used the jackhammer technique.


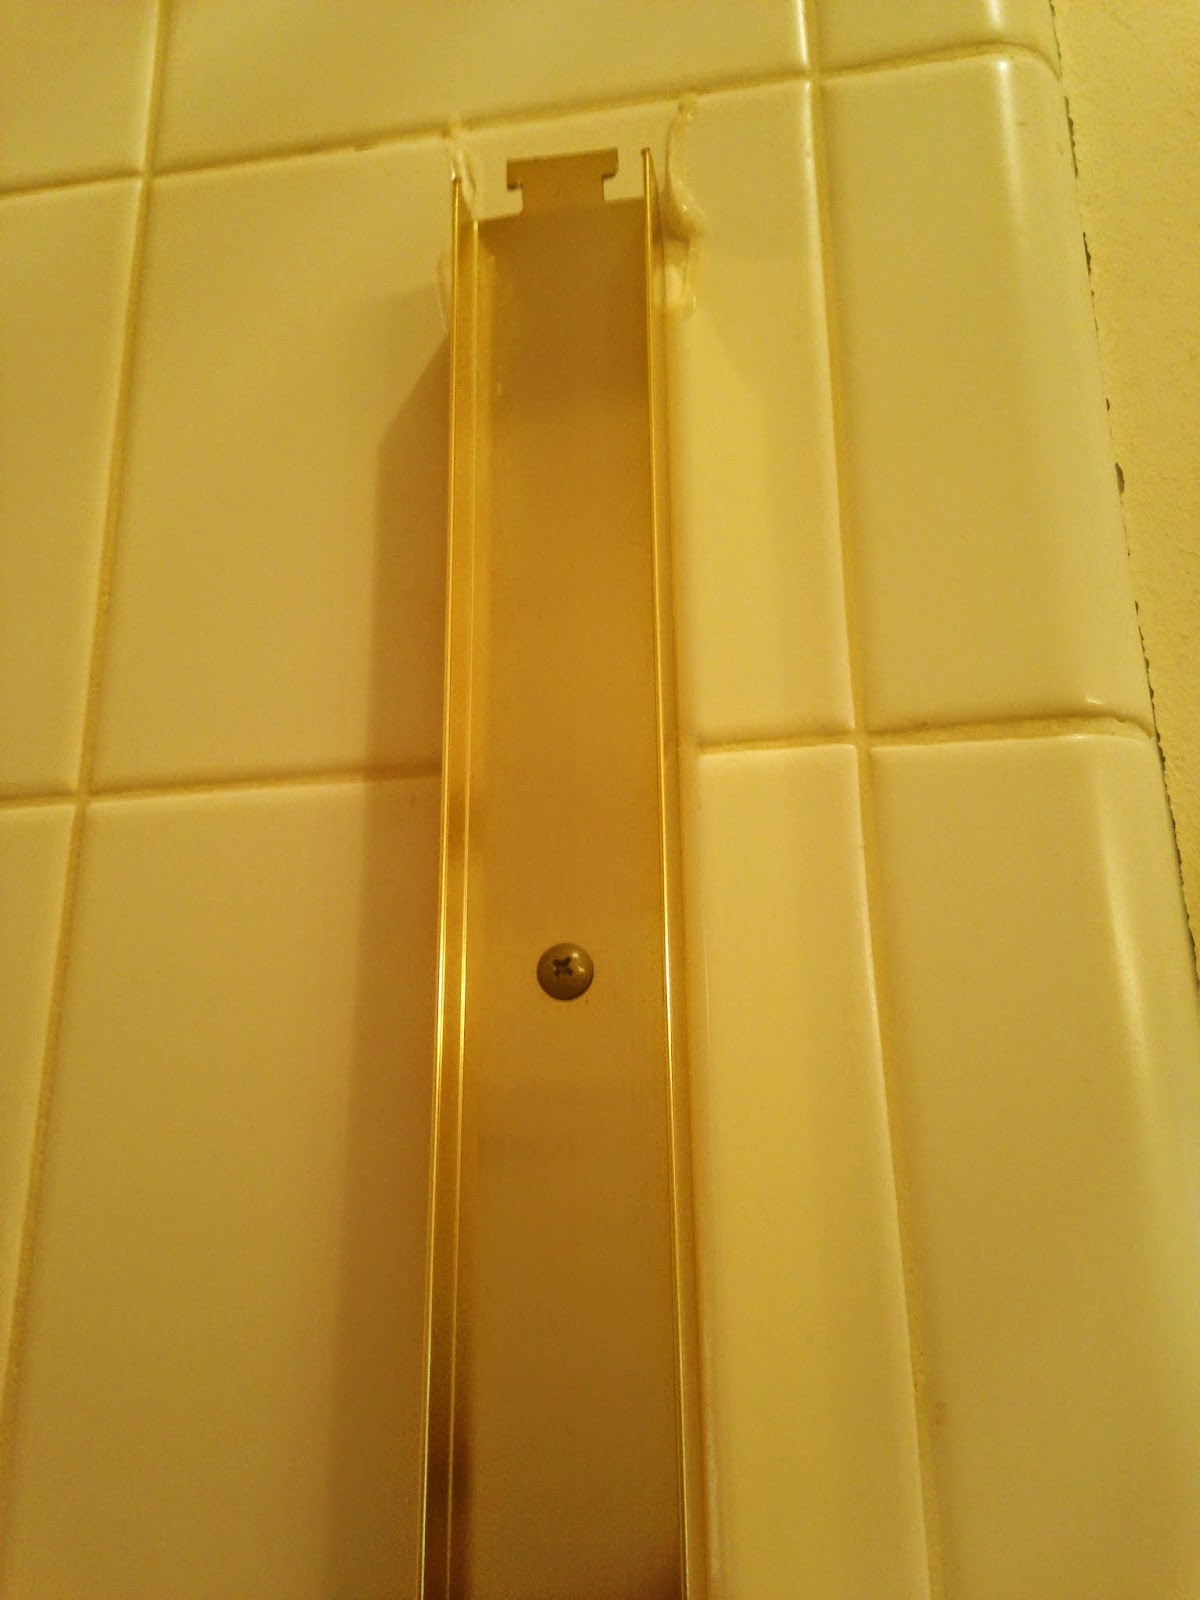
Once the screws were removed I tried pulling the rail off the wall. The top was separating but the middle wasn't going anywhere.

Here's what was going through my head: "Katy...what's the deal? This was going so smoothly until now. Maybe you need to keep scoring the caulk. Nope. Let's try again. Nope. That didn't work." After about 10 minutes of confusion and further investigation, I found a screw still attached in the wall, hiding behind this little black piece. What  a trickster that screw was.

That was literally the hardest part of the project. I don't lie. Once the screw was removed, the rail popped off just as easily as the first one. I, of course, did the same thing to the other vertical rail and then moved my way down to the rail along the bathtub.

This one wasn't connected with screws so I just had to lift the caulk up with the box knife again.
 
*Side note- I almost didn't include this picture because the rail looks so sick nasty and I'm embarrassed. I pinky promise that we clean on a regular basis. This just goes to show how grody and hard to clean these shower doors are. It makes me even MORE glad that I removed it.

The only un-fun part of this project was the caulk left behind on the tile and tub that had to be scraped off. This part was left to the husband. My argument was that I did all the hard part and heavy lifting by removing the doors and rails so  the LEAST he could do was scrape a little caulk off the walls. Isn't marriage fun?


We're also left with a few holes from the screws. Anyone have a solution for these? Do I fill them with grout? I have some researching to do.
After buying a tension rod and curtain, here's the finished product!

Let's take one last visit to the before picture, just because it's fun.
Doesn't it look like a different bathroom? (Just say yes.)
 
We obviously have more exciting plans than to just use a plain white shower curtain. Here's the color palate we've chosen.
 Imagine that...more grey. We can't help it that grey is our favorite color. (besides purple but Devin won't allow me to paint all our walls purple)

Has anyone else contemplated removing their sliding shower doors? If not, you should!

Peace out,
Katy


Monday, June 23, 2014

We're Wallpaper Free!

Sort of. If you don't count the fact that we painted over all the wallpaper in the kitchen. The last remaining visible wallpaper was in our guest bath and it was finally time to send it packing.


I'm realizing that I did a horrible (technically non-existent) job at photo documenting the removal of the wallpaper. There really wasn't much to see though. The top layer of this wallpaper was SO easy to remove...I'm assuming the steam from many uses of the shower helped out our cause. No water, fabric softener or steamer was required in removing it. Just our good ole' fingers. We probably took the majority of the top layer of the wallpaper off in an hour or two.
Doesn't it look so fresh and so clean (clean)?
http://www.npr.org/templates/story/story.php?storyId=120255173


The backing layer wasn't going anywhere though. I kept visualizing the nightmare that was our half-bath. Remember? It took FOREVER to get the wallpaper backing off the walls. And that was a quarter of the size of  this bathroom.  Here's a visual in case you want to re-live the misery.
 I refuse to do that again. I turned to plan B. We had such great success painting over the wallpaper in the kitchen so this time I decided to keep the backing on and texture over it. I wasn't sure if the backing would soak the texture up differently because it's more of a porous paper-y material than the top layer of wallpaper.  I tested it out by texturing over a seam. I mainly wanted to make sure it didn't peel up or bubble from the mud.
Luckily, the mud dried perfectly. I haven't actually textured the whole room...just this tiny test section. Soon enough, you'll find out why the walls aren't done yet. (hint: we have another big project on the to-do list in this room that we have to finish first). Gotta love cliffhangers.

Have a great week!
Katy

Saturday, June 14, 2014

Antler Art

Did you see our new gallery wall?  If so, you may have noticed that we have antlers hanging on the wall. Yep...we're THOSE people now. You know, the people that have zero interest in hunting, have never been closer than 50 feet from a deer, and yet have deer antlers on their wall. I'm following the trend and I'm perfectly okay with it. At first I was looking to purchase my own antlers but A. that's no fun and B. they're expensive.  Like these from Pottery Barn for $239...no thank you. I could buy a piece of furniture for that price. Touche to Pottery Barn for convincing people to buy fake antlers for the price of my little brother.
Pottery Barn Antlers

I also like the antlers-with-the-whole-animal-head-attached look too. It's a technical term. These paper mache ones from West Elm are awesome and are significantly cheaper than the Pottery Barn. They're still $84 for the larger sized heads though and they just weren't doing it for me.
West Elm Paper Mache Animals

Insert Katy craft project here.  I happen to have an aunt that buys deer antlers, paints them, and resells them on Etsy. It's all the rage right now <you can see here> She purchased a huge box of antler pairs with skulls attached on Craigslist and thought she had found the antler jackpot. She later found out  that reselling antlers with the skull attached is violating some federal law. Oops. Something about how they don't want people killing deer for their antlers and the only way to get both antlers on the skull is (obviously) for the animal to die. Apparently deer shed their antlers one at a time though (who knew?...not me) so reselling one shed antler is okay. So long story long, she gave me a deer skull with a nice pair of antlers.

I purchased some acrylic paint and a wooden plate at Hobby Lobby and went to town.

I decided that the skull part was grossing me out. I kept thinking about where the eye balls and brain would be in relation to the part I was holding. Mind boggling stuff. No wonder I don't hunt. In order to make things less gross, I decided to paint the wood plate the same color as the skull to camouflage the skull.  Then, I painted the antlers a nice bright green.

Next, I taped off the tips of the antlers for that dipped/color blocked look, and painted the ends gold.

We waited for the antlers to dry and then used E-600 glue to attach them to the plate.

We also needed a way to hang the plate to the wall so I screwed a simple picture bracket to the back.
How easy was that project? Easier than finding a hillbilly at an OU game.


Does anyone else have antlers on their wall?
Have a great weekend!
Katy


Sunday, June 1, 2014

We Joined the Bandwagon

We did it. We joined the bandwagon that is gallery walls.  I haven't met a gallery wall I didn't like and I had to have one of my own. Since our walls have been bare since we moved in, I decided it was about time to grab a hammer and nails and hang a few (or 18) frames on the wall in our living room. You should have seen Devin's face when I explained my vision....He's learning that MY visions become HIS projects. So you can imagine how thrilled he was with my idea. I had a feeling this wouldn't be a very fun task for an OCD/perfectionist type like him but I knew he'd make sure everything looked picture perfect (see what I did there) so I asked for his help anyway. Thank goodness I married a good sport, and praise Jesus for a level.

Here's the 'Before'. It's hard not to notice that embarrassingly large, bare wall .

And here's our gallery wall in all its gloriousness. I am uhhbsessed. Just imagine how great this room will look when we replace that fan with a chandelier.... Which is still up for debate here at the McEntire house. He wants a newer fan for practical reasons. I want a pretty, shiny light figure for beautiful-house-decor reasons.


Most the frames are either garage sale finds or are purchased from Ikea or TJMaxx.  All very inexpensive. I wanted the frames to look cohesive so the majority are white and then I mixed in a few brown and green accents. We didn't spend much money on art either.

I found this gem at a garage sale for $5. The frame and matte weren't really doing it for me but the map is sooo cool.
So, I simply removed the map and put it in one of my new white frames.

I also grabbed a few sheets of my favorite scrapbook paper at Hob Lob and framed them. Gotta Love cheap, instant art! And no gallery wall is complete without some herringbone right?


I wanted to add some personal items to our wall as well. We saved the cork from the bottle of wine we  drank right after we got engaged so I framed some scrapbook paper and glued the cork to the paper. The frame was a 50 cent thrift store find that I spray painted white. Easy Breezy (beautiful cover girl)

Does this picture look familiar? The frame was another garage sale purchase.

I also made the antler art...more on that in another post. Ohhh the suspense.


To hang everything, we laid all the frames out on the floor to get an idea of spacing. I've seen other blog posts that recommend cutting out pieces of paper in the same sizes/shapes as your frames to hang on the wall first for spacing purposes (like this). That sounded like a great idea buttttt I was a little too lazy to do all that.

We did make sure to measure though. We got an overall idea of the total length and width of the wall so that the arrangement would be centered. We also left enough space below the frames to account for a potential future sectional.

How did we hang them you ask? We used the good ole' Pinterest tape trick on the frames. Worked like a charm.
(The photo tutorial is from This Blog)

And that's it! It's starting to feel a little more like us in here. I wonder if I can get away with a gallery wall in every room.....Just kidding. Kind of.


Have a great Sunday evening!
Katy

P.S. I'm linking up to the Best of the Nest , The Shabby Nest, and Inspire Me Please !